What to Expect When Removing Window Tint: Common Problems
Removing window tint might seem like a straightforward task, but it often comes with its own set of challenges. Whether you're dealing with bubbling, discoloration, or outdated tints, understanding the potential issues during removal can save you time, money, and frustration. This guide will walk you through common problems you may encounter and offer tips on how to handle them effectively.
Understanding Window Tint
Window tint is a thin film applied to the inside of car windows, home windows, or commercial buildings. It serves various purposes, such as reducing glare, blocking UV rays, and enhancing privacy. However, over time, you might find the need to remove it due to fading, bubbling, or simply wanting a change.
Common Problems When Removing Window Film
Adhesive Residue
One of the most common issues when removing window tint is the adhesive left behind. The adhesive used to apply the tint can be stubborn and difficult to remove. If not handled properly, it can lead to a sticky mess that attracts dirt and dust.
Solution:
- Use a commercial adhesive remover or a mixture of soap and water to loosen the adhesive.
- A razor blade can be used carefully to scrape off the adhesive. Ensure the blade is sharp and used at a low angle to avoid scratching the glass.
- Rubbing alcohol or vinegar can also be effective in breaking down the adhesive.
Scratched or Damaged Glass
During the removal process, there's a risk of scratching or damaging the glass, especially if you use sharp tools like razor blades. This is particularly true for older windows or those with existing damage.
Solution:
- Always use a new razor blade and apply gentle pressure.
- Consider using a plastic scraper as a safer alternative.
- Work slowly and methodically to avoid applying too much pressure or force.
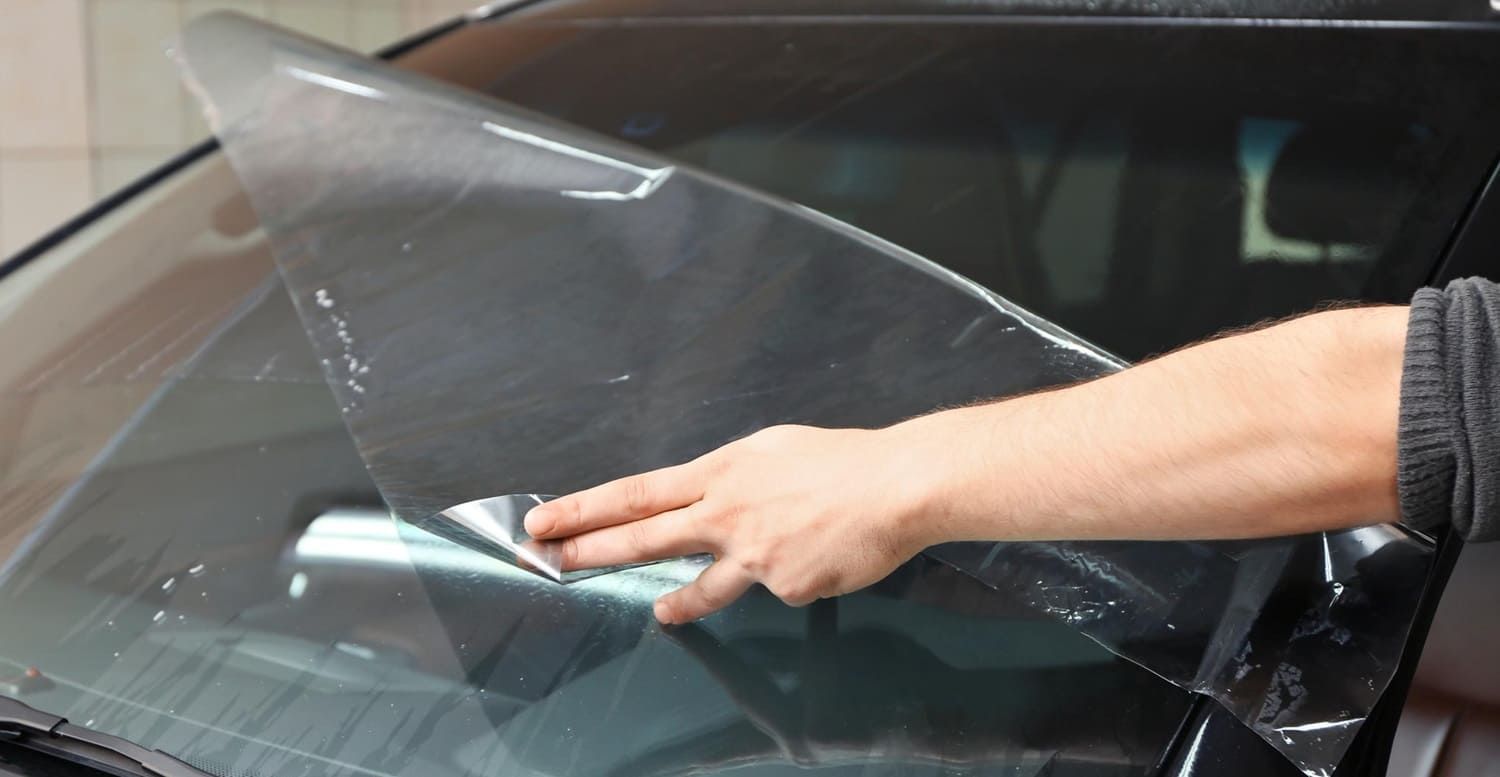
Film Sticking to the Glass
Over time, window tint can become brittle and adhere strongly to the glass. This can make removal challenging and increase the risk of leaving small pieces of film behind.
Solution:
- Use a heat gun or hairdryer to gently heat the tint, which can help loosen the adhesive and make it easier to peel off.
- Start at a corner and peel slowly, applying heat as needed to facilitate the process.
- If small pieces are left behind, use adhesive remover to clean them up.
Discoloration and Staining
Sometimes, window tint removal can reveal discoloration or staining on the glass. This can happen if the tint has been in place for a long time or if the adhesive has reacted with the glass.
Solution:
- Clean the glass thoroughly with a glass cleaner after tint removal to assess the extent of discoloration.
- If discoloration persists, consider using a glass polishing kit to restore clarity.
- In severe cases, professional cleaning services may be necessary.

DIY vs. Professional Window Tint Removal
While many people opt to remove window tint themselves, there are scenarios where professional services might be the better choice.
When to Consider Professional Help
- Large Surface Areas: Removing tint from large windows or multiple windows can be time-consuming and may require specialized tools.
- Old or Brittle Tint: Older tints may be more difficult to remove without damage.
- Lack of Tools or Experience: If you don't have the right tools or are unsure about the process, professional help can prevent costly mistakes.
Preparing for Window Tint Removal
Before starting the removal process, it's important to gather all necessary tools and materials. This preparation can make the process smoother and reduce the likelihood of encountering problems.
Tools You May Need:
- Razor blade or plastic scraper
- Heat gun or hairdryer
- Adhesive remover or soapy water
- Clean cloths or paper towels
- Glass cleaner
- Rubbing alcohol or vinegar
Step-by-Step Guide to Removing Window Tint
- Start with Heat: Use a heat gun or hairdryer to warm the tint, starting at a corner. This will help loosen the adhesive.
- Peel the Tint: Once the tint is warm, begin peeling it away from the glass slowly. Use steady, gentle pressure to avoid tearing.
- Remove Adhesive Residue: After the tint is removed, use adhesive remover or soapy water to clean any leftover adhesive.
- Clean the Glass: Finish by cleaning the glass with a glass cleaner to ensure it's free of residue and streaks.
Final Thoughts
Removing window tint can be a manageable task if you are prepared for the common problems that may arise. At Enterprise Window Tinting, we offer free estimates to help you understand the process. By understanding the challenges and knowing how to address them, you can achieve a clean, clear finish without damaging your windows. Whether you choose to tackle the project yourself or hire a professional, the key is patience and attention to detail.
Remember, the goal is to remove the tint while preserving the integrity of your glass. With the right approach, you can enjoy the benefits of clean, untinted windows in no time.